Audacity is a free and open-source digital audio editor and recording application software.

This tutorial provides a guide to making your first microphone recording with Audacity, using TASCAM DR-05X.
- Using TASCAM as an audio interface
- Selecting your Recording Device in Audacity
- Making a test recording
- Recording and Editing
Using TASCAM as an audio interface
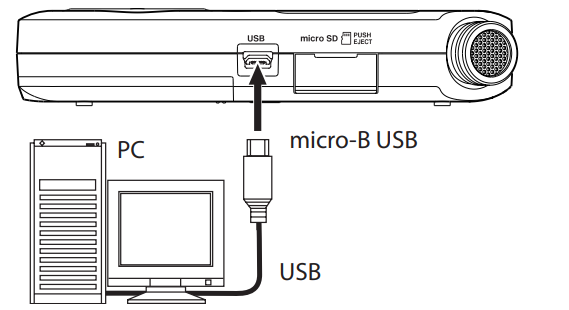
By connecting TASCAM to a computer you can use it as an audio interface.
Step 1. Use a USB cable to connect it to a computer, and turn the unit on.
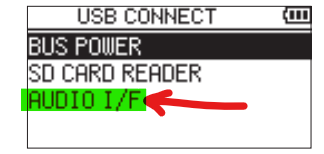
Step 2. The USB CONNECT screen will open. Use the + and – buttons to select AUDIO I/F and press play.
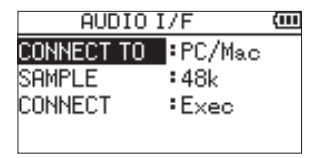
Step 3. The AUDIO I/F screen will open. Select the connected device (PC), the sampling rate (48k) and Exec
Step 4. When the unit connects with your computer, the USB AUDIO I/F screen will open:
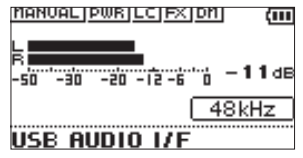
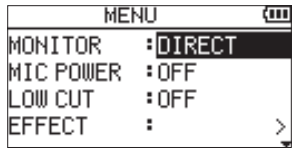
Step 5. To monitor the input sound without latency, press MENU button and choose DIRECT.
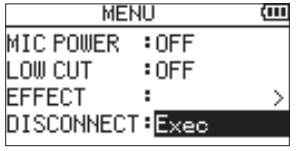
To disconnect the unit from the computer, press the MENU button and select Exec:
Selecting your Recording Device in Audacity
- Open Audacity.
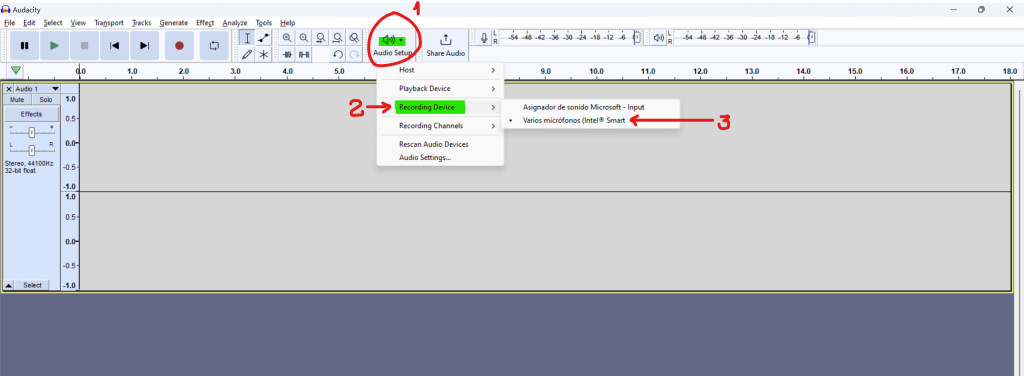
- Click on the Audio Setup button (1) in the top tooldock.
- Choose your Recording Device (2) from the dropdown menu (3).
You can make the settings in Audacity’s Device Toolbar. To enable the Device Toolbar, click on View > Toolbars:


Making a test recording
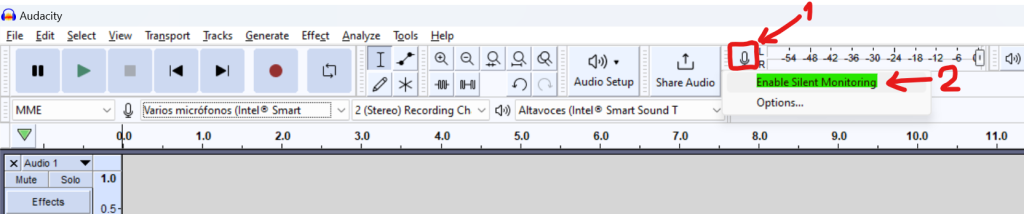
Turn on monitoring
Click on the microphone symbol (1) and select «Enable Silent Monitoring«:
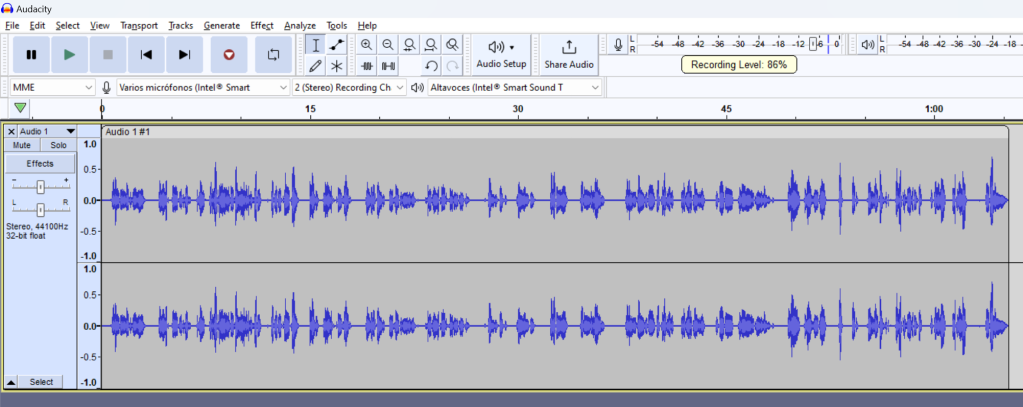
Adjust the level
Talk at a normal volume and watch the Recording Meter:

Adjust the recording volumen by clicking and draggint on the slider in the recording meter. Minus 6 DB is a good target.

Test recording
Now you are ready to do a test recording!
Source: PSCD Video 2024
- Sergio: They say you don’t go to class, Nuria.
- Nuria: I liked to play chess, but they started to send me anti-bullfighting messages to hurt me, so that I would not go to the final. Chess is no longer… beautiful.
- Sergio: Friends will show up and make jokes on the Internet, but sometimes the joke goes too far. They are not your friends. Tell me how you feel.
- Nuria: I like to be alone. I don’t know what’s wrong with me.
- Sergio: There is no player in all of Ciudad Rodrigo with as much talent as you. You are worth more than all those who tell you that.
- Nuria: There is a person who sends them to me.
- Sergio: Who?
- Nuria: Diego. He is the other finalist. They expect me to compete, but I want to run away.
- Sergio: Nuria, ¡no!
- Nuria: Thank you, Sergio.
- Sergio: We are all with you, Nuria.
- Nuria, you can do it! Ole! Come on, you can do it! You’re going to win! Ole! Come on! No to cyberbullying!
Get the TASCAM ready and click the Record button (1). Record while talking the dialogue and then click the Stop button (2):

Recording and Editing
Recording
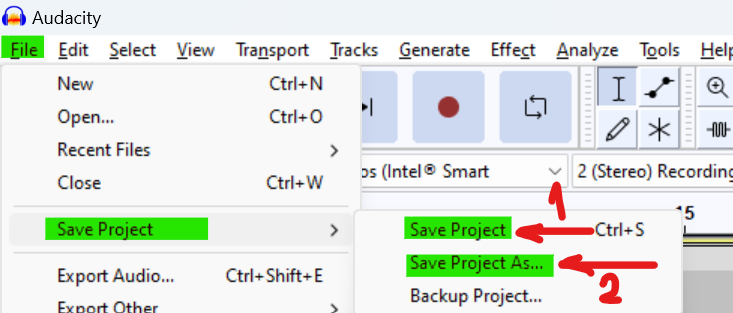
Create a new Project by clicking File > Save Project > Save Project (1) or File > Save Project > Save Project As (2):
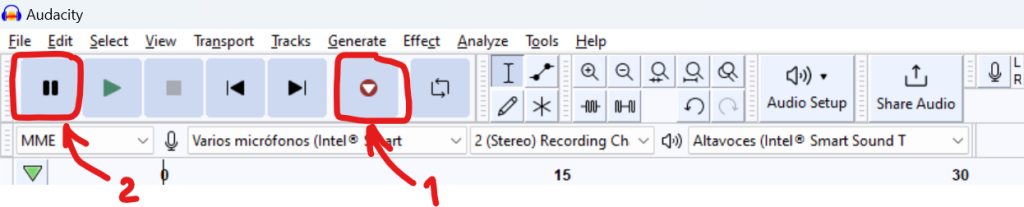
Start your recording by pressing the Record button (1). You can pause and restart the recording with the Pause button (2).
Editing
When you have finished recording, press the Stop button and save your recording into the Project you started by using File > Save Project > Save Project.
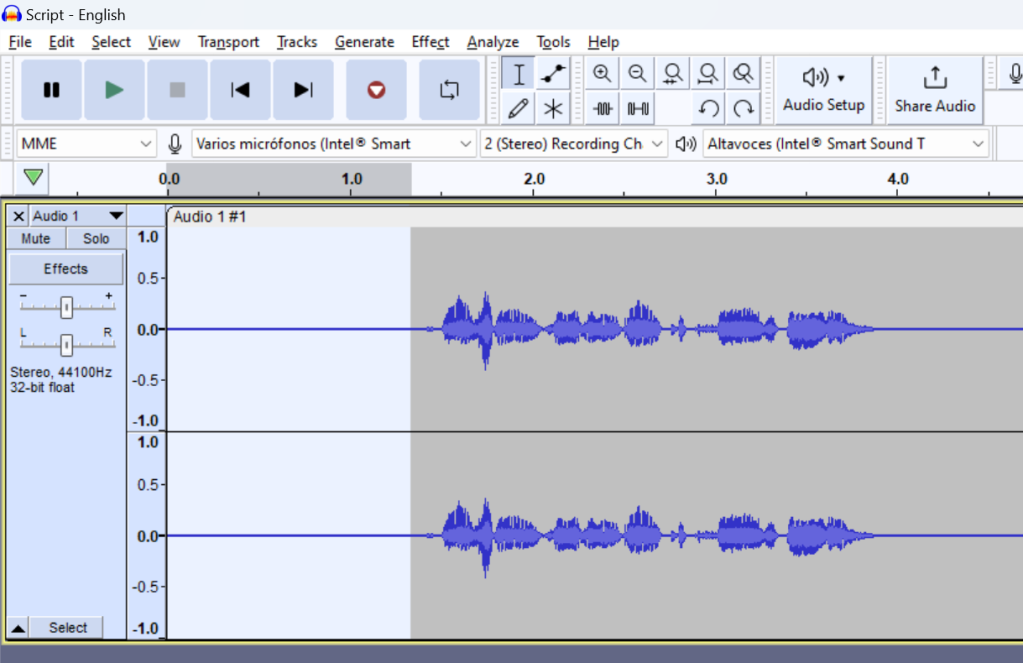
Now the data is safe, you can edit it in Audacity.
You have a good recording, but there are some bits at the beginning and end that you do not need.
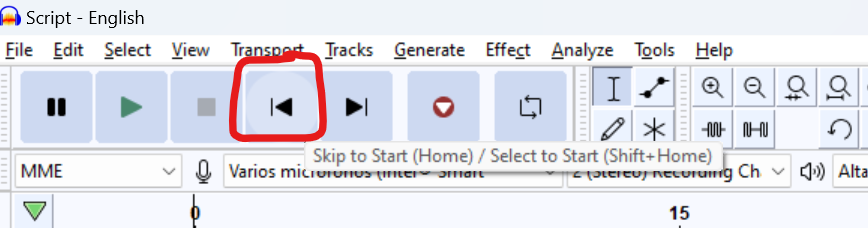
Step 1. Click the Skip to Start button in Transport Toolbar.
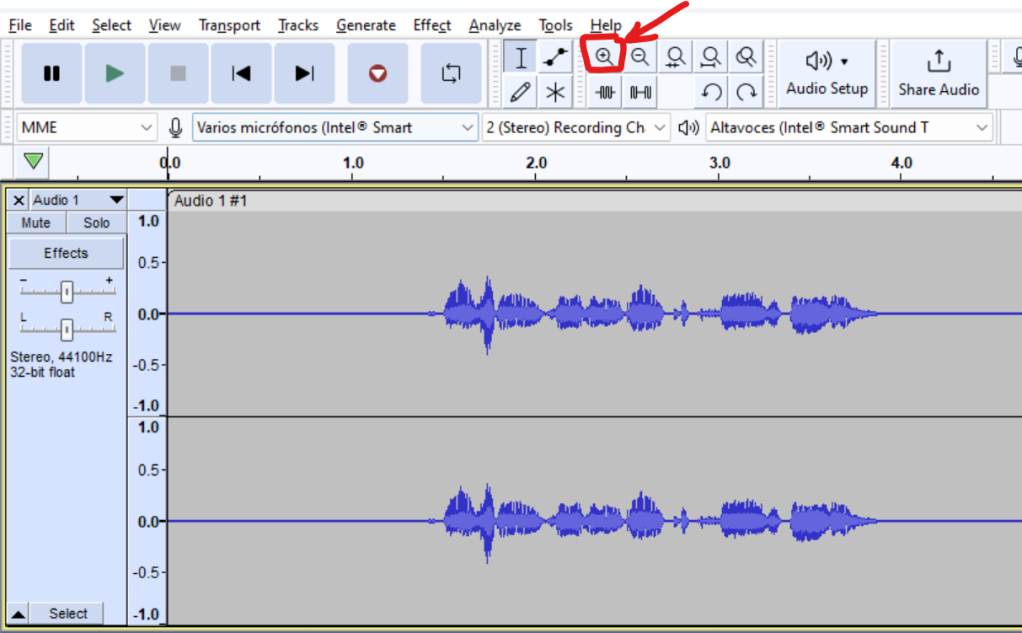
Step 2. Click the Zoom In button until the waveform expands so you can see from the beginning of the recording to the time you started talking.
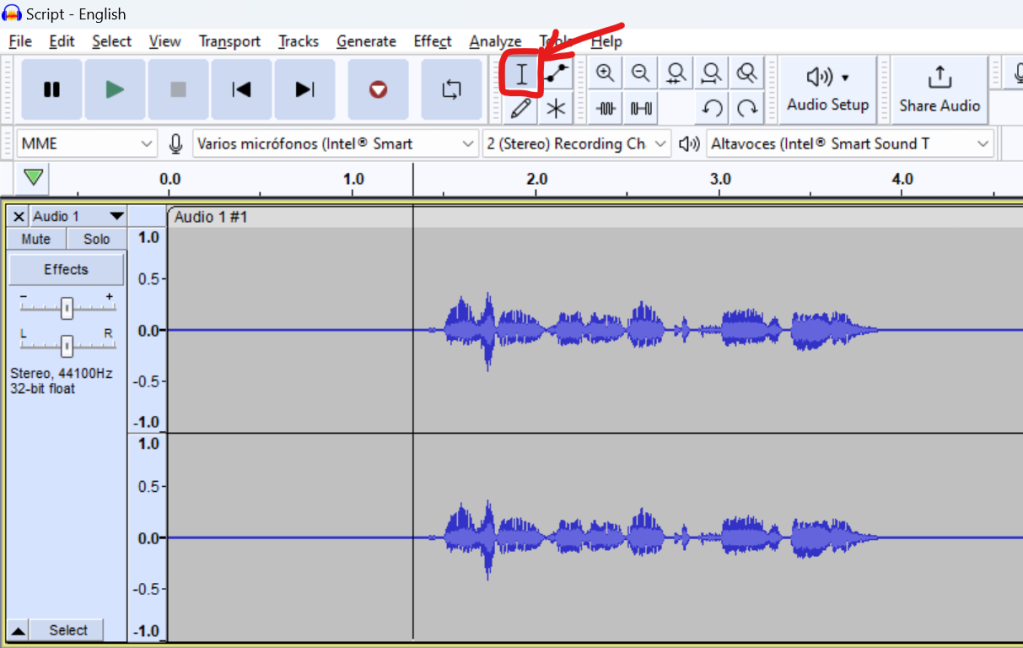
Step 3. With the Selection tool, click just before the point where you started talking:
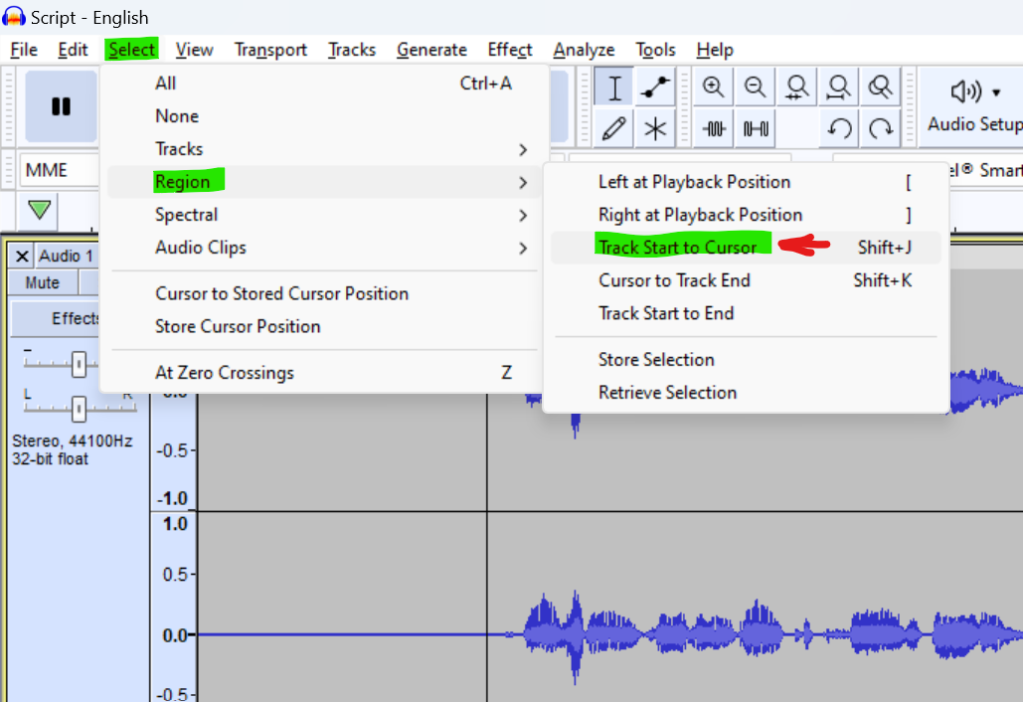
Step 4. Choose Select > Region > Track Start to Cursor:
Step 5. Choose Edit > Delete, or press the DELETE key.

Step 6. Similarly, you can delete the extra bit from the end of the recording (Chose Cursor to Track End).

Step 7. If you hace made any mistakes in your performance you could edit them out. Use the Selection Tool to select each mistake and press the delete key.
Adjusting amplitude
It is likely that your recording is not as loud as possible. To correct this you can use the Normalize effect.
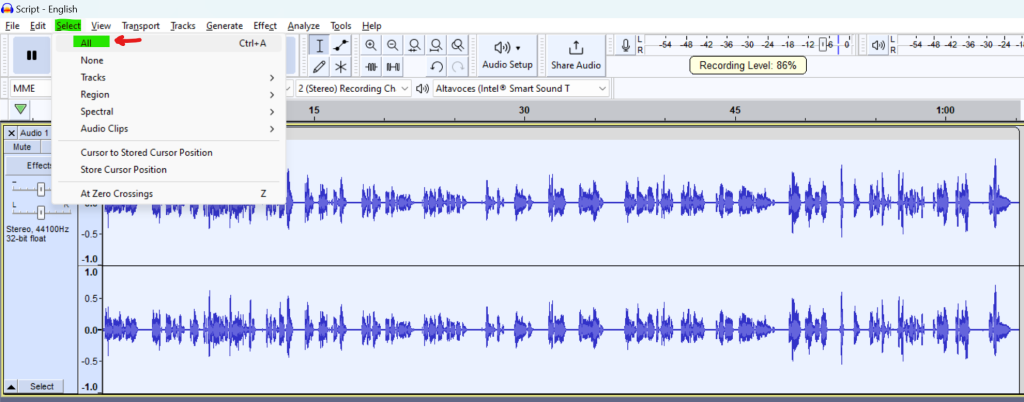
Step 1. Choose Select > All to select all the track.
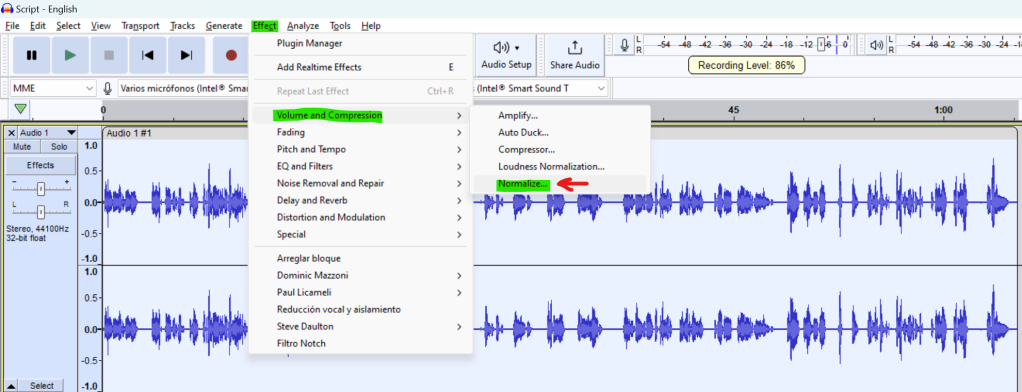
Step 2. Choose Effect > Volume and Compression > Normalize.
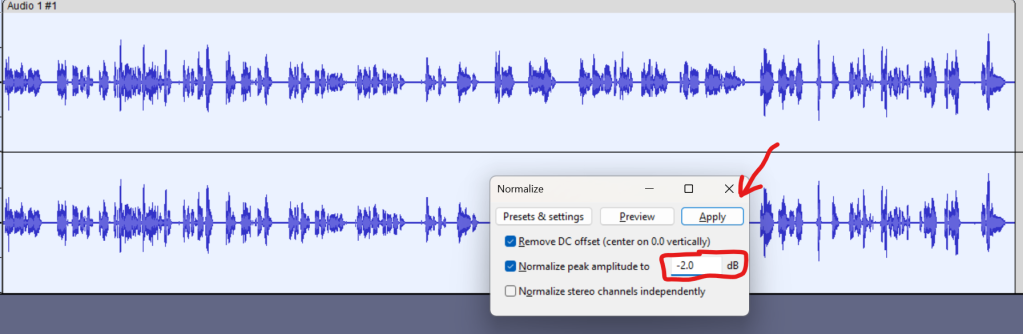
- Set the «Normalize peak amplitude to» in the Normalize dialog to be -2dB.(To correct unwanted volume differences between left and right, uncheck «Normalize stereo channels independently»)
- Click the Apply button.
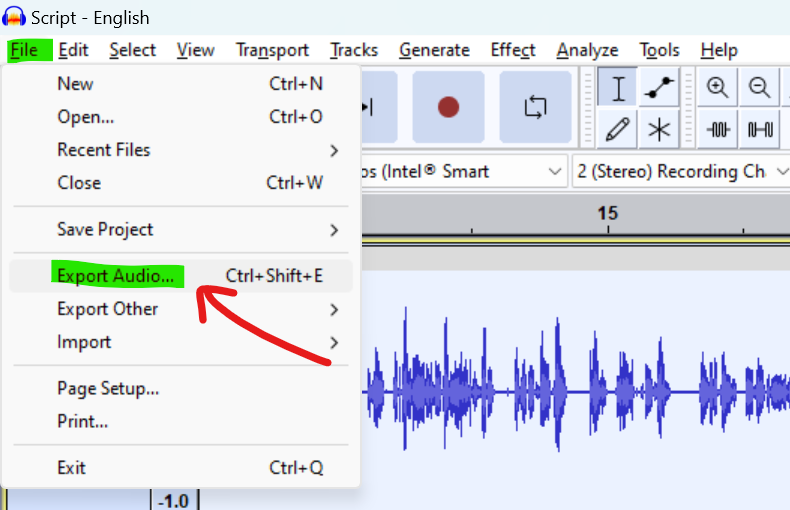
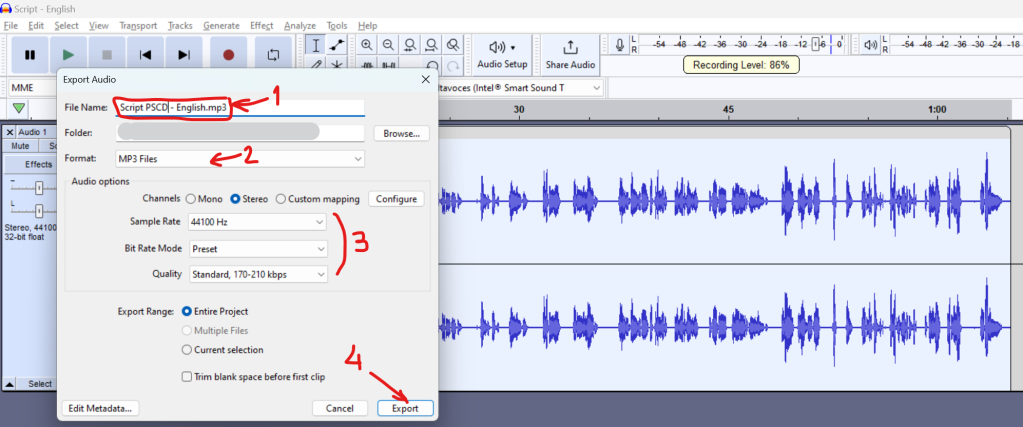
Exporting
When you are happy with your editing, you need to export the recording as an audio file such as WAV or MP3. To export a single audio file, use the File>Export Audio command.
Backup
Backup your exported WAV or MP3 files – you do not want to lose all that valuable work and have to do it all over again, do you?

Deja un comentario